


Whirlpool Dryer 279827 Motor Change
Disconnect power first: Many dryers that I see have the two piece front, but some are the full front with no lower access panel on the bottom front. The lower panel can be removed by using a straight screw driver to pry it off the upper clips, place screw driver in the middle top area ( below the door opening ) and "pop" it out towards you, sometimes you may have to do this at the side top corners of the lower panel as well. Once un-clipped from the top clips, the panel will have to be lifted up off the lower clips towards you. Once the lower panel is off, you should be able to see 2 screws on the bottom corners of the door panel, loosen these 2 screws off a couple of turns, but do not remove them. From here you can see the idler pulley, motor, belt break switch and part of the belt. To go further in the disassembly, lift the cover from the lint filter or if yours is the one with a filter and cover together, remove the whole filter. You will see 2 screws under the cover/filter, remove them. Now, you will need a putty knife or a thin shafted straight screw driver to remove the top panel. Push the putty knife or screw driver here to "pop" the front top clips. The top panel will hinge back towards the wall and can be left there. Just inside the top of the front panel, you will see 2 screws, remove them. You will see the wires for the door switch on the right side, remove the metal clips to allow a more loose wire harness, hold the drum up slightly in one hand and tilt the top of the front panel towards you, you can now lift it off of the screws that you loosened earlier and place it on the right side of the dryer cabinet. On the dryers with a full front, use the same directions but you can ignore the lower panel and the loosen the screws parts. The front will lift off of 2 clips about 6 inches from the bottom and again be placed on the right side of the cabinet. You should undo the belt from the idler pulley and motor pulley, now you are ready to remove the drum. Just grab hold of both ends and lift it out.
Disconnect power first: Once you have the top tilted up and inner front screws off, you pull the top of the front panel out towards you and lift the front panel off the clips that hold the bottom of the panel onto the cabinet. The front is placed onto a clip on the front of the dryer cabinet, the front panel has a square hole in it that will sit on a tab built into the front clip. You must pull up slightly to disengage it from the clip and push down slightly to reinstall the front onto the clip.
Once the drum is lifted out, you should see the motor and motor wires on the right side at the bottom. Write down what color wire goes to what # terminal. The motor has a small pulley on the belt end and a fan blower that is screwed to the other end of the motor. This is a good way to unscrew this LEFT HAND threaded fan blower. If your old motor does not have a flat section to place the crescent wrench on, use a pair of vise-grip pliers to grab the motor shaft.

Use a large straight screwdriver to push down on one end of the green motor clips to remove them. They are spring loaded, once one side is "popped" off, they will lift off easily. Lift the motor out of it's carriage.
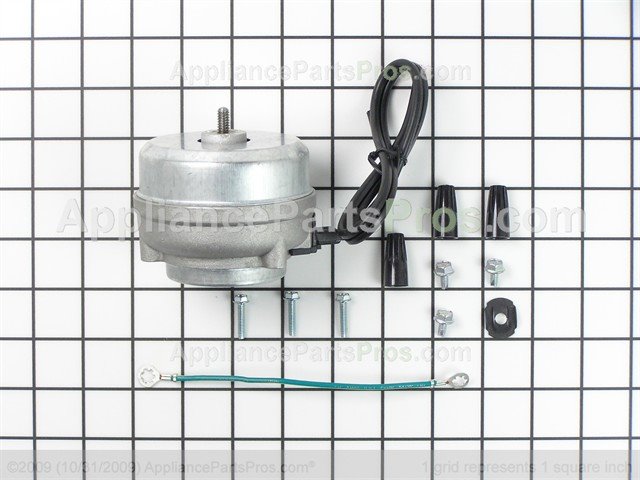
Note: Not every fan blower can be saved/removed :-(
Sometimes that blower has been married to that motor shaft too long and you will need to break it off to replace the motor.

A common fan blower
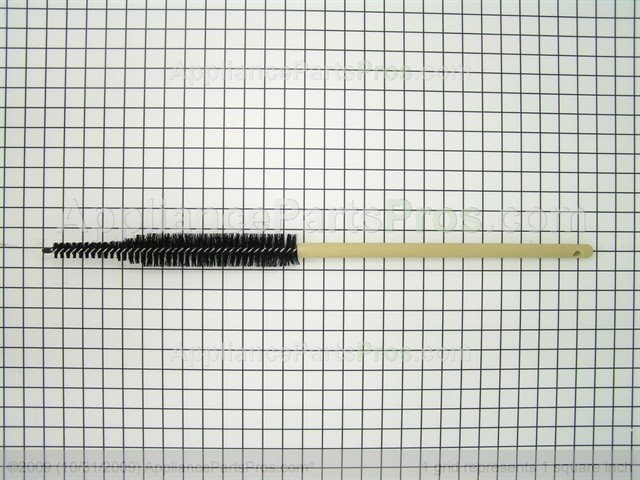
While inside the dryer, check the rollers, idler pulley and belt at the same time.
Reverse to install the new motor. See below if you need motor wiring help.
Help for wiring a 279827 new style motor.....

(Click on the picture above for a larger view)
- Disconnect power first
- Remove the old wires from the motor writing down the colors and #'s of each wire. *( this is important!! )*
- Remove old motor
- Install the new motor
- Remove the blue wire that is connected from the terminal # 4 on the new motor to the thermal overload switch ( see the picture of the motor on the right side above )
- Cut off old terminal and crimp the new terminal provided on the black wire from # 6 on the old motor and the white wire from # 5 on the old motor.
- Remove the red wire from terminal # 2 from the old motor and install on the terminal # 2 on the new motor.
- The black wire that went to terminal # 6 from the old motor, now install it ( with the newer smaller terminal ) onto # 6 on the new motor.
- The white wire that went to terminal # 5 from the old motor, now install it ( with the newer smaller terminal ) onto # 5 on the new motor.
- The red wire that was on terminal # 1 on the old motor goes onto terminal # 1 on the new motor.
- The blue wire from terminal # 4 on the old motor goes onto the motor thermal protector terminal. This is the terminal left over from the removed blue jumper wire....please see the right side picture above.
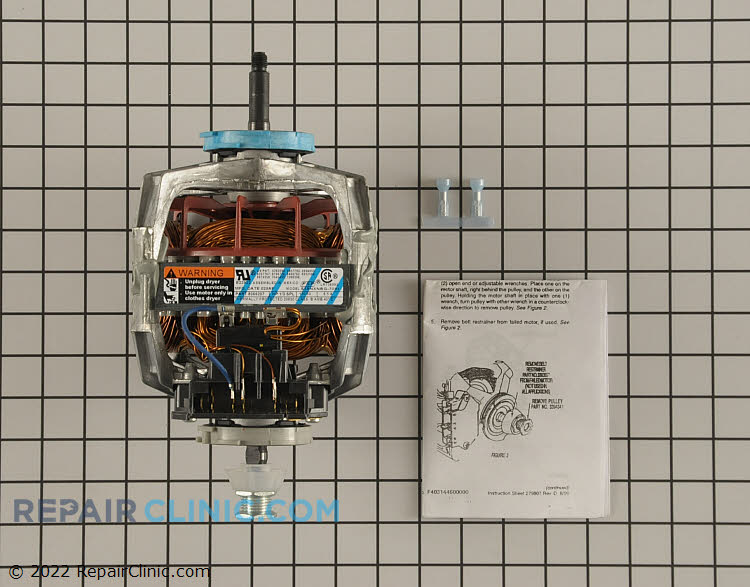
Dryer drum drive motor, Includes pulley for dryer drum drive belt.
![]()

